Ce billet n’a pas encore été traduit en français. La version anglaise est disponible ci-dessous.
Why would one need netconsole?
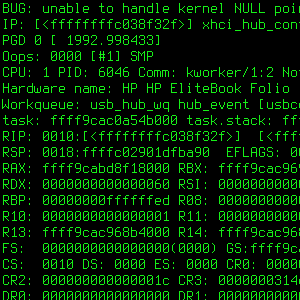
Sometimes the Linux kernel crashes so badly that it leaves no traces in the logs. Even having a shell with a dmesg -w running in the background might prove to be insufficient.
There’s a nice tool in the kernel which makes it possible to send kernel logs over the network. It’s called netconsole. As far as limitations are concerned, one shall note that it’s UDP only, and over Ethernet (in other words: no wireless). The good news is that it can usually make the last crucial lines available, as it requires a rather limited set of features (as opposed to getting files written on a filesystem, which needs to get onto physical storage).
Example: netconsole made it possible to get a stacktrace of a kernel OOPS when writing to some USB mass storage devices, and to file #917206 in the Debian bug tracking system.
Terminology: Let’s call the crashing machine a patient and the logging machine a doctor.
The netconsole module needs to be loaded on the patient only, while the doctor just needs a user-space program to capture traces. If the module’s configuration needs to be updated or fixed, the module can be unloaded at any time through:
sudo modprobe -r netconsole
It is also highly recommended to ask the kernel to log all the things by setting this specific console log level:
sudo dmesg -n 8
The current console log level can be checked by dumping the contents of the /proc/sys/kernel/printk file, and reading the first value. With the default configuration on Debian 9 (Stretch), the console log level is 4, which isn’t sufficient to confirm netconsole is properly set up; it seems one needs at least console log level 7.
Easy case: on a local network
Here’s an example with both machines on a local network:
- Patient’s IP is
192.168.0.1; - Doctor’s IP is
192.168.0.2; - They can be wired together directly, or there can be switches on the path.

Doctor setup
A receiver is needed on the doctor side, which needs to accept UDP packets. There are several nc (short for netcat
) implementations, e.g. netcat-traditional and netcat-openbsd, with subtly different flags. Let’s use socat instead:
sudo apt-get install socat
socat UDP-LISTEN:6666,fork - | tee -a ~/netconsole.txt
Let’s dissect those lines:
socatlistens on port6666for theUDPprotocol.- With the
forkoption, one ensures there’s always asocatprocess left behind, instead of risking an early termination once a given input has been processed. This could generateconnection refused
issues otherwise. socatwrites to the standard output (-) which is redirected toteethrough the pipe (|).teewill itself print messages to its standard output but also log them in the specified file.- With the
-aflag,teewill happen new messages to the specified file instead of overwriting it, should the command be stopped and started again. - Running as non-privileged user is sufficient as port 6666 is not privileged (because 6666 ≥ 1024).
Of course the doctor needs to accept such packets, and its firewall might need an update accordingly. If it isn’t maintained through shorewall, ferm, or another dedicated firewall software, the following iptables command might serve as a basis to get packets through:
sudo iptables -A INPUT -p udp -m udp --dport 6666 -j ACCEPT
Patient setup
Now, to have the patient send stuff to the doctor, a simple modprobe call is needed:
sudo modprobe netconsole netconsole=@/eth0,6666@192.168.0.2/
What happens here? One requests the netconsole module to be loaded, and one specifies the parameters. Details can be read in the Linux kernel documentation (Documentation/networking/netconsole.txt), but concentrating on the points of interest here:
eth0is the output interface on the patient’s side. Specifying it might be useful if the patient machine has several Ethernet interfaces, it can be omitted otherwise.192.168.0.2is the doctor’s IP.6666is the UDP destination port. 6666 is the default and can be omitted.
That should be enough to get this output on the doctor side:
[ 1748.295633] netpoll: netconsole: local port 6665
[ 1748.295637] netpoll: netconsole: local IPv4 address 0.0.0.0
[ 1748.295639] netpoll: netconsole: interface 'eth0'
[ 1748.295640] netpoll: netconsole: remote port 6666
[ 1748.295642] netpoll: netconsole: remote IPv4 address 192.168.0.2
[ 1748.295644] netpoll: netconsole: remote ethernet address AA:BB:CC:DD:EE:FF
[ 1748.295647] netpoll: netconsole: local IP 192.168.0.1
[ 1748.295702] console [netcon0] enabled
[ 1748.295704] netconsole: network logging started
If nothing appears there, one might want to double check the current console log level (see introduction), and possible packet drops/rejects on the firewall side.
Slightly harder case: over internet
Because one might not have a second machine handy, it’s also possible to go through a router and send stuff across the internet. Let’s consider this case:
- Patient’s IP is
192.168.0.1; - Patient is connected to internet through a router, which has IP
192.168.0.254; - The doctor, available over the internet, has IP
93.184.216.34.

Doctor setup
The instructions are the same as in the local case, even if it would probably make sense to be more selective regarding firewalling: filtering on the source IP would likely be a good idea.
Patient setup
The fundamental change compared to the local network
use case is the need for routing. This is supported by netconsole but one needs to specify an extra parameter: the MAC address of the (first) router. To obtain it, one can use net-tools’s arp command or iproute2’s ip neighbour command:
arp 192.168.0.254
ip n show 192.168.0.254
Supposing it returned the 01:02:03:04:05:06 MAC address, loading the module becomes:
sudo modprobe netconsole netconsole=@/,6666@93.184.216.34/01:02:03:04:05:06
Now, if one is running into firewall-related issues, one can change the source port for the UDP packets. The default is 6665, but assuming one wants to send from an unfiltered 1234 port, that becomes:
sudo modprobe netconsole netconsole=1234@/,6666@93.184.216.34/01:02:03:04:05:06
Permanent debugging?
The approach presented here is temporary by nature, as no modifications of the patient’s system configuration are involved. If desired, one can set the various options to be passed to the netconsole module in a modprobe configuration file. Example with a dedicated modprobe.d snippet:
echo options netconsole netconsole=@/eth0,6666@192.168.0.2/ | sudo tee /etc/modprobe.d/netconsole-local-debugging.conf
Even with such an extra configuration file, those settings would only get applied when the netconsole module is loaded. To have it loaded automatically at boot-up, it can be listed in /etc/modules or in a separate modules-load.d snippet:
echo netconsole | sudo tee /etc/modules-load.d/netconsole.conf
Warning: That relies on having network set up early in the boot process (which won’t be documented here because that’s another topic and that would be require a long digression). If the network isn’t configured already at the time netconsole is set up, one can get:
sudo dmesg | grep netconsole
[   11.677066] netpoll: netconsole: local port 6665
[   11.677143] netpoll: netconsole: local IPv4 address 0.0.0.0
[   11.677216] netpoll: netconsole: interface 'eth0'
[   11.677287] netpoll: netconsole: remote port 6666
[   11.677356] netpoll: netconsole: remote IPv4 address 192.168.0.2
[   11.677430] netpoll: netconsole: remote ethernet address ff:ff:ff:ff:ff:ff
[   11.677514] netpoll: netconsole: device eth0 not up yet, forcing it
[   15.432381] netpoll: netconsole: no IP address for eth0, aborting
[   15.432540] netconsole: cleaning up
In any case, it might be a good idea to also automate setting a sufficiently high console log level. Passing loglevel=8 on the kernel command line could be a way, or a tiny start-up script calling dmesg -n 8 or updating the /proc/sys/kernel/printk file. <p>Enjoy tracking down kernel bugs!